 . For U.S.

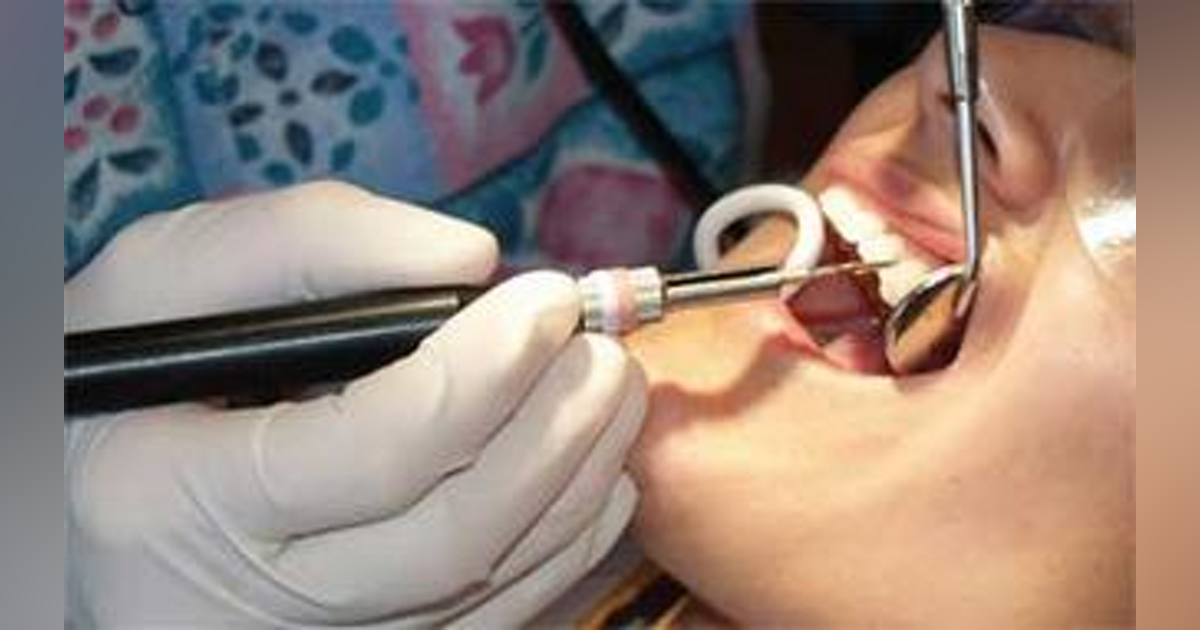
How To Clean Cavitron Inserts
2021 Aug 24th
At your dental practice, every tool you and others use must be clean and sterilized after every use. These tools are being used to clean the mouths of your patients so cleaning them properly is incredibly important. For some tools, that’s a quick process. But for your Cavitron inserts and tips may need a little extra care to make sure that they continue to work properly for as long as possible.
What are Cavitron Inserts?
Cavitron is a type of ultrasonic scaler that works to scale calculus deposits underneath the gum line. There are ultrasonic inserts and ultrasonic scaler tools that help hygienists deep clean in more thorough and precise ways. It offers significant benefits over hand scaling because it effectively cleans plaque and calculus from the tooth.
These ultrasonic inserts offer a better view and more control for the dental hygienist deep cleaning a client’s teeth. Cavitron offers a variety of different tips that allow for deep cleaning and scaling in all kinds of situations.
The technology is unique in that their shape, materials they’re made from, and angles at which they’re placed on the handle give the hygienist better access below the gum line than other ultrasonic inserts.
Learn the Cleaning Process for Your Cavitron Ultrasonic Inserts

When you purchase a set of Cavitron ultrasonic scalers and ultrasonic inserts, you should also be able to get an ultrasonic cleaning unit, ultrasonic cleaning solution, and an enzymatic cleaning solution. You’ll need all of these things to clean your Cavitron inserts.
Proper personal protective equipment (PPE) like gloves, a gown, and a face shield should be worn when handling inserts for cleaning. During deep cleaning, fluids like blood and saliva can be stuck in the crevices and cannula’s of the tools and while you’re cleaning them, that debris can get on you.
Using an Ultrasonic Bath and Cleaning Unit
- Remove the insert from the handpiece.
- Rinse your inserts thoroughly with the ultrasonic cleaning solution.
- Clean tips with an enzymatic solution. Ultrasonic cleaning alone will not sterilize them.
- If you have cassettes to put your inserts into, place them carefully before placing them in the ultrasonic cleaning unit.
- If you don’t have cassettes, place the loose inserts in the cleaning unit in a single layer. The tools should not be stacked because the weight of them on top of each other may cause damage.
- While positioning the hand piece over a sink, activate the “purge” function for at least 20-30 seconds. This is the CDC recommendation for cleaning in between clients.
- Remove the handpiece from the main unit and put on a tray or inside a cassette to be run through the ultrasonic cleaning unit.
- An ultrasonic cleaning bath can be used for up to 15 minutes. Avoid cleaning Cavitron inserts with other instruments. Doing so could result in damage.
- Remove the instruments from the ultrasonic cleaning bath, rinse thoroughly, and allow them to dry completely before being sterilized.
How to Clean Inserts Manually
- While wearing proper PPE, use a long-handled brush to get into all the small areas of each tool. Hold the tools at arm’s length in the basin where they’re being washed.
- Clean thoroughly with a detergent using the brush. As you’re getting into all the tiny areas and holes of the tool, do not lean forward or put your face near it.
- Rinse with warm water and get all the detergent off. You can use a syringe to get water into the smaller areas of the tool so you know it’s been rinsed.
Sterilization (This is the same process for both manual cleaning and cleaning in the ultrasonic bath)
- After cleaning, the tools will need to be disinfected. For this, you can use disinfecting wipes. Wipe each tool individually with a disposable disinfectant wipe and a disinfectant solution.
- Note the concentration of the disinfectant solution you use when wiping off each instrument and for how long you cleaned it.
If you’re not able to perform a full sterilization cycle on every instrument between clients, then new and fully processed instruments should be used. Cavitron inserts that are waiting to be sterilized should be stored safely away from all other instruments and soaked in an enzymatic solution.
Pre-soaked tools must be completely covered in the enzymatic solution and then stored in a covered container. Before being sterilized, rinse them and clean with water until the solution is completely rinsed off. Do not use regular disinfectants or sterilizers on tools that will be run through an ultrasonic cleaning unit. They will be disinfected after they come out of the unit.
Keep Your Investment Safe
When you know how to clean your Cavitron inserts properly, you’ll be able to keep using them for the full length of time they should be used. When maintained well, your Cavitron inserts should last approximately 8-15 months, depending on frequency of use.
Every person in your practice should be trained in how to clean the Cavitron inserts you’ll be using. Not only should they be sterilized between clients, they should also be cleaned according to the above procedures as often as possible. If you have a dryer for the instruments, the whole process will take around an hour. If not, the process will take longer because the instruments must be dried completely before being sterilized and used again.
Investing in Cavitron ultrasonic inserts will give your clients the opportunity for better and more efficient cleanings at every appointment. Protect this investment by cleaning and maintaining your tools regularly.